It's been a very long absence from the blog due to yet another house move...... hopefully the last for a while.
This meant that the time had come to pull the art stuff out of storage!
I've relocated to a small flat in an Old Rectory in the village of Checkley,
Staffordshire. As for neighbours, I have a beautiful church complete with graveyard. On the downside I still don't have the have the luxury of a
dedicated studio to put all the art materials into, it's taken some adjusting too and I've had to streamline things significantly, because as much as I love
Fancis Bacon's studio I don't think I could live in a 'Baconesque' workspace!
What's next? I've spent months thinking about my work, the
main aim now is to undertake some larger works on vellum as well as some more complex graphite pieces, all of which have been in the planning for more than a year.
For
the first time I'll be working with whole vellum skins. Natural vellum
is a slightly more challenging surface than Kelmscott but I prefer the
colour and venation for the autumnal subjects. The larger sized works
will need space, which is something I'm pretty short of, so there's a
real need to be organised.
 |
| Trying to be organised! |
So first things first.... time to sort out the new workspace.
This will no
doubt involve some trial and error and it's going to be tricky given
the small working area! I've a decent window ( the one shown below and
another larger window. A small desk fits into the window space so that
will do the job nicely. The main problem is that I have too much stuff! -
it's currently a bit like
a cockpit that I have to climb into!
Having had such a
long break from the blog it seemed like a natural thing to take stock,
and, I though it might be useful to write about the materials and
equipment that I use as this always seems to be of interest. It will
help me to decide what stays and what has to go. Being organised and
comfortable in the workplace, with everything at hand is often more
difficult than it might first seem.
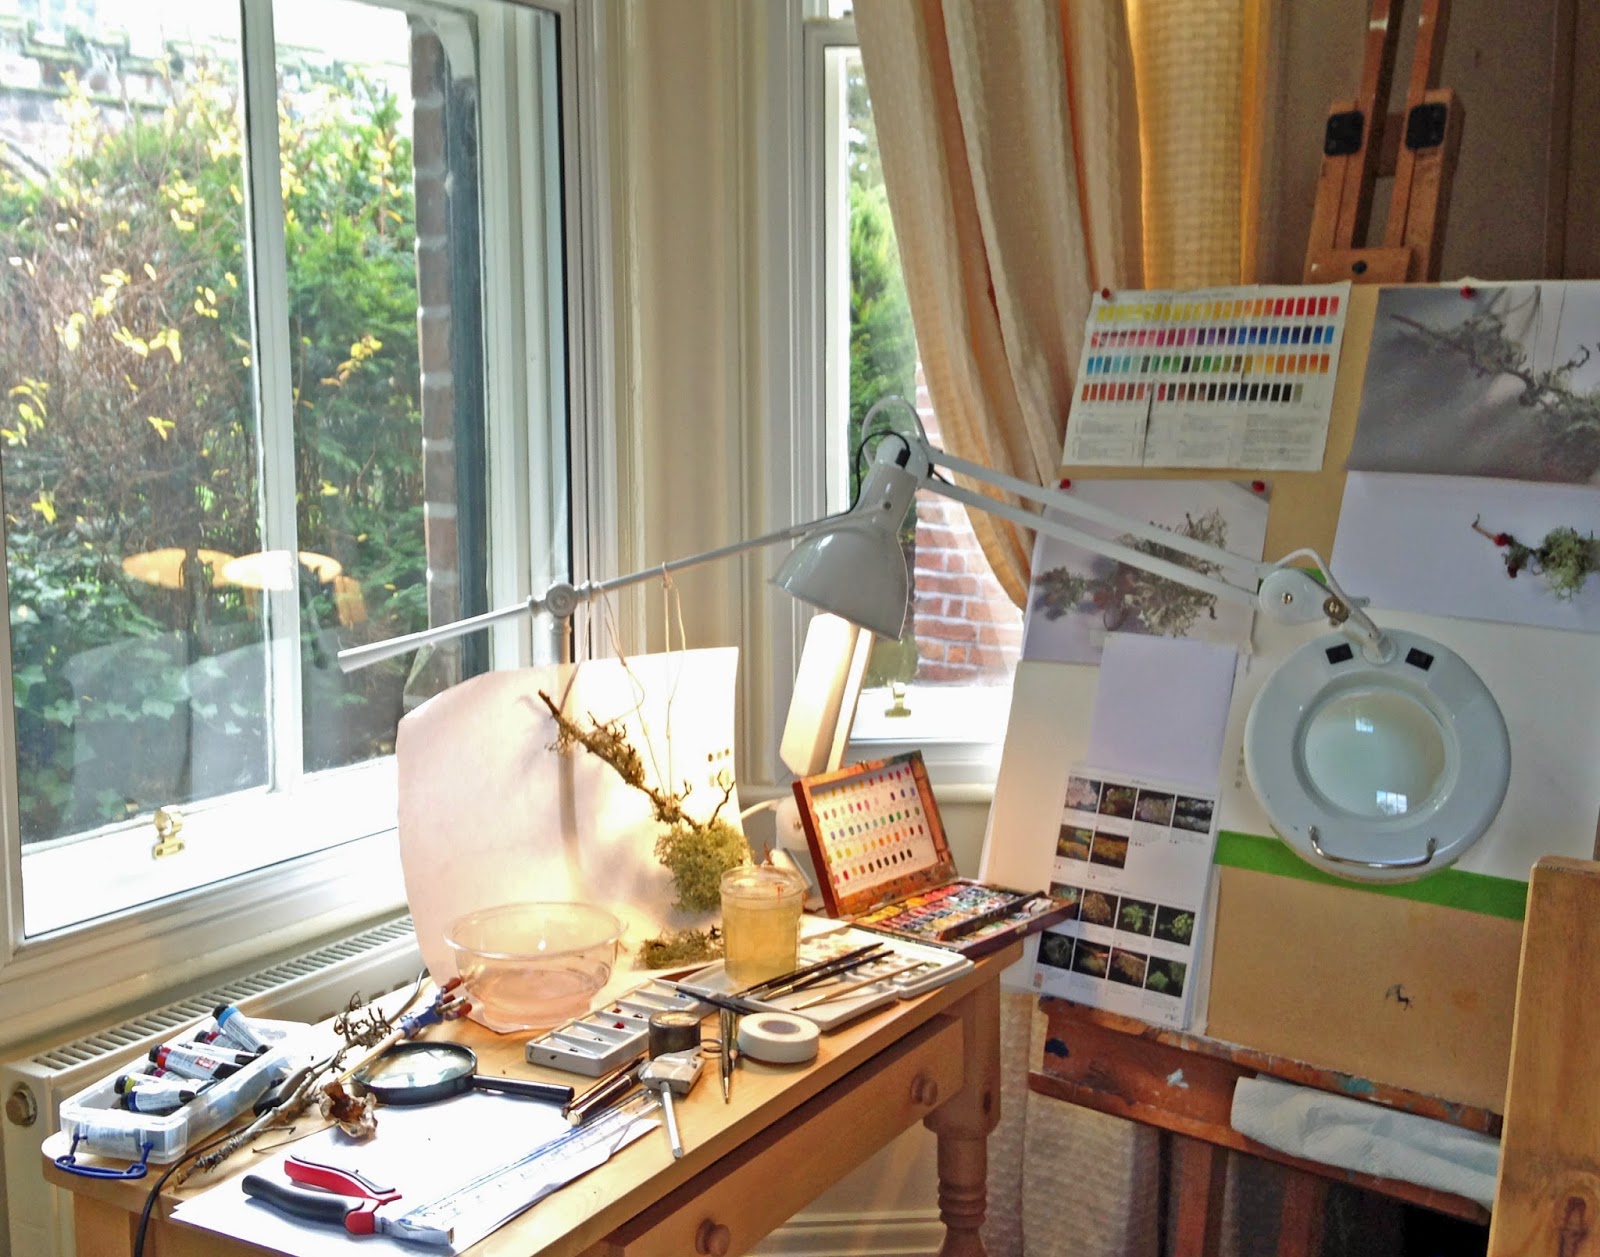 |
| Not
very organised workspace! The easel sits at the side of the small desk
with reference material pinned to the drawing board. Angle poise
illuminated magnifier lamp is bolted to the desk and positioned over the
drawing board. The long drawer in the desk houses rulers, dividers,
viewfinders, painting mediums and various measuring devices as well as
the smaller cutting mats. |
The first consideration is the desk and easel.
Having looked at lots of lovely desks including the ones that tilt, I
decided that I didn't have enough room for a fancy desk or large table. When considering the fact that I prefer to work fairly upright, and, being a fairly 'dry' painter, I decided that a separate easel is the way
to go with a small desk alongside. This is actually an improvement -
it's not the first time I've used the easel, it's particularly good for
larger works and can tilt slightly to suit. An adjustable height seat can be
raised and lowered making it easy to reach those difficult areas or I can stand. I've always used a steeply angled drawing board,
to me it's the only way to see the work accurately, otherwise the work
is leaning away with and the perspective distorted, the spine becomes strained
if you struggle to see the work properly by leaning over it...that's bad in the long term. The only problem with
an upright desk based drawing board is the redundant space behind the board, which
tends to gather clutter. I already had my old easel from my art school
days ( 30 something years!) so no need to buy anything new, which is a bonus! It's a
radial easel,
which is pretty heavy weight and made from beech wood. This type of easel can also be folded and stored too and
the tripod feet allow good positioning at the base.
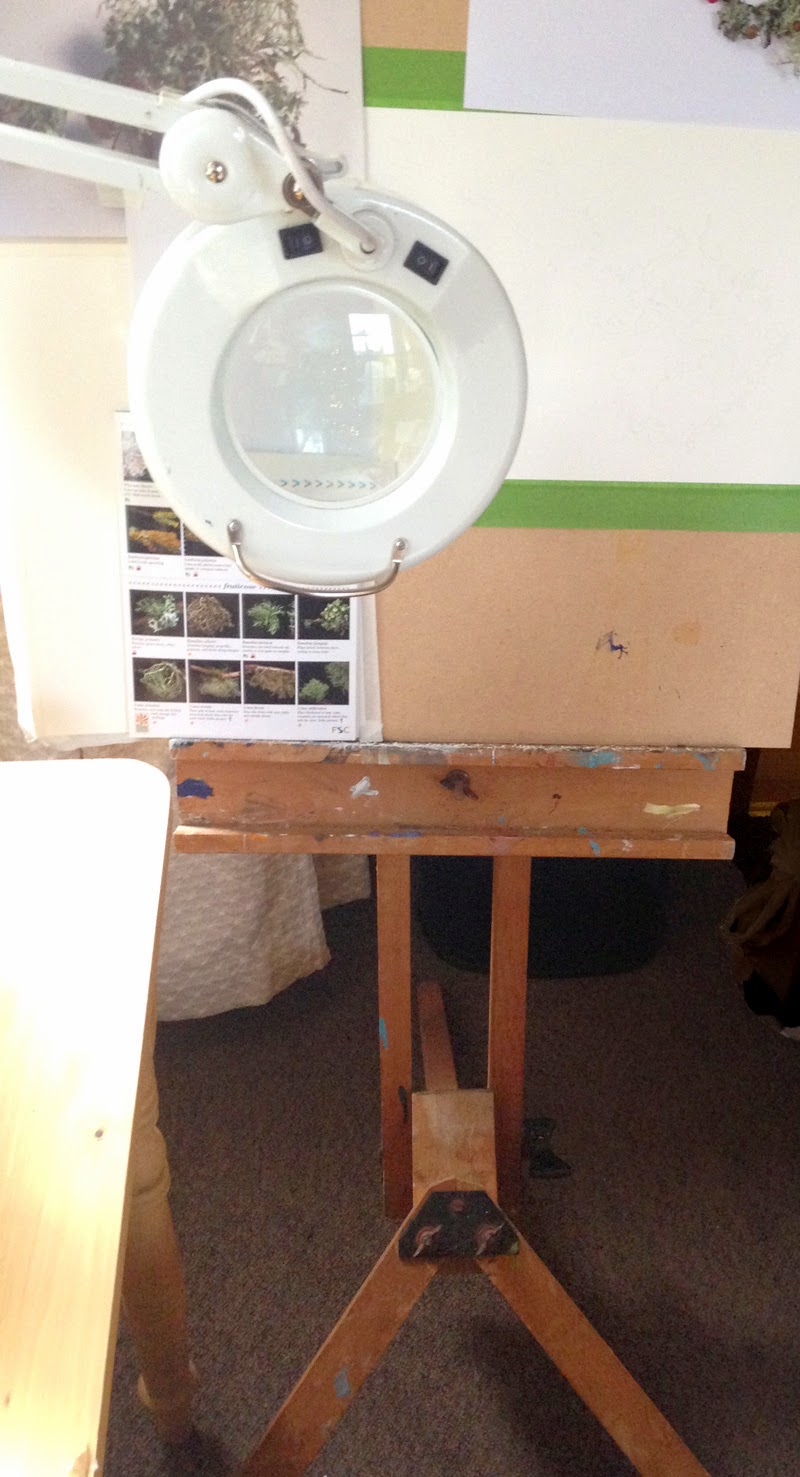 |
| Radial
easel has adjustable height and can lean a fair bit too if needed The
tripod base allows the feet to tuck under the chair and desk, so you can
get up very close or work further away at a height that suits, with the
option of standing too. A pair of pliers is needed to secure the nuts,
otherwise the weight of the drawing board can cause the support to fall |
The other advantage is being able to use
different sizes of MDF drawing boards,
which I had cut at the DIY store. This way I can use the most
appropriate sized board for the work and swap between works. The board
can be positioned at a comfortable working height on the easel depending
on the size of the work,
notes, photos and even some subjects can be pinned to the board so that they're in the direct line of vision.
Having material in the line of vision is important when painting. The
desk alongside can be used to position and light the subject as well as
for small works, sketchbooks and materials etc.
So what else do I really need in the work area? First of all
the technical stuff - this can takes up quite a bit of room
.
Technology can be really useful in planning work, especially when the
subject is dying on you or short lived, occasionally its the only route
available material. My first space saving idea is to ditch the laptop
from the immediate workspace and instead I opted for an
iPad Air with the addition of the the small keyboard, which works a treat! The iPad or tablet is a very handy tool for viewing detailed reference materials, it can be
positioned on the desk or on the drawing board ( again direct line of vision). With the right programmes it's easy enough to do most of the same things on the iPad as on the laptop.
I use Photo Transfer App for moving photos from different devices (
iPhone to iPad I
use the Air Drop but use Photo Transfer to the laptop). Work on the laptop is done outside the painting area. I use a
Canon wireless printer,
which sits on a small table in case I want to print off any reference
material. It's always useful to take lots of photos. tend to throw the
photos onto the floor to get inspiration for compositions by looking at
shapes. I use a combination of photos taken on the iPhone or iPad which can
print directly to the printer. For better quality I use an
Sony alpha 100 DSLR camera. It's an older DSLR now but still takes great pictures. I use
Photoshop Elements 13 to edit, having just upgraded I previously used PS 8 for a number of years. To be honest PS 8 does as much as I need.
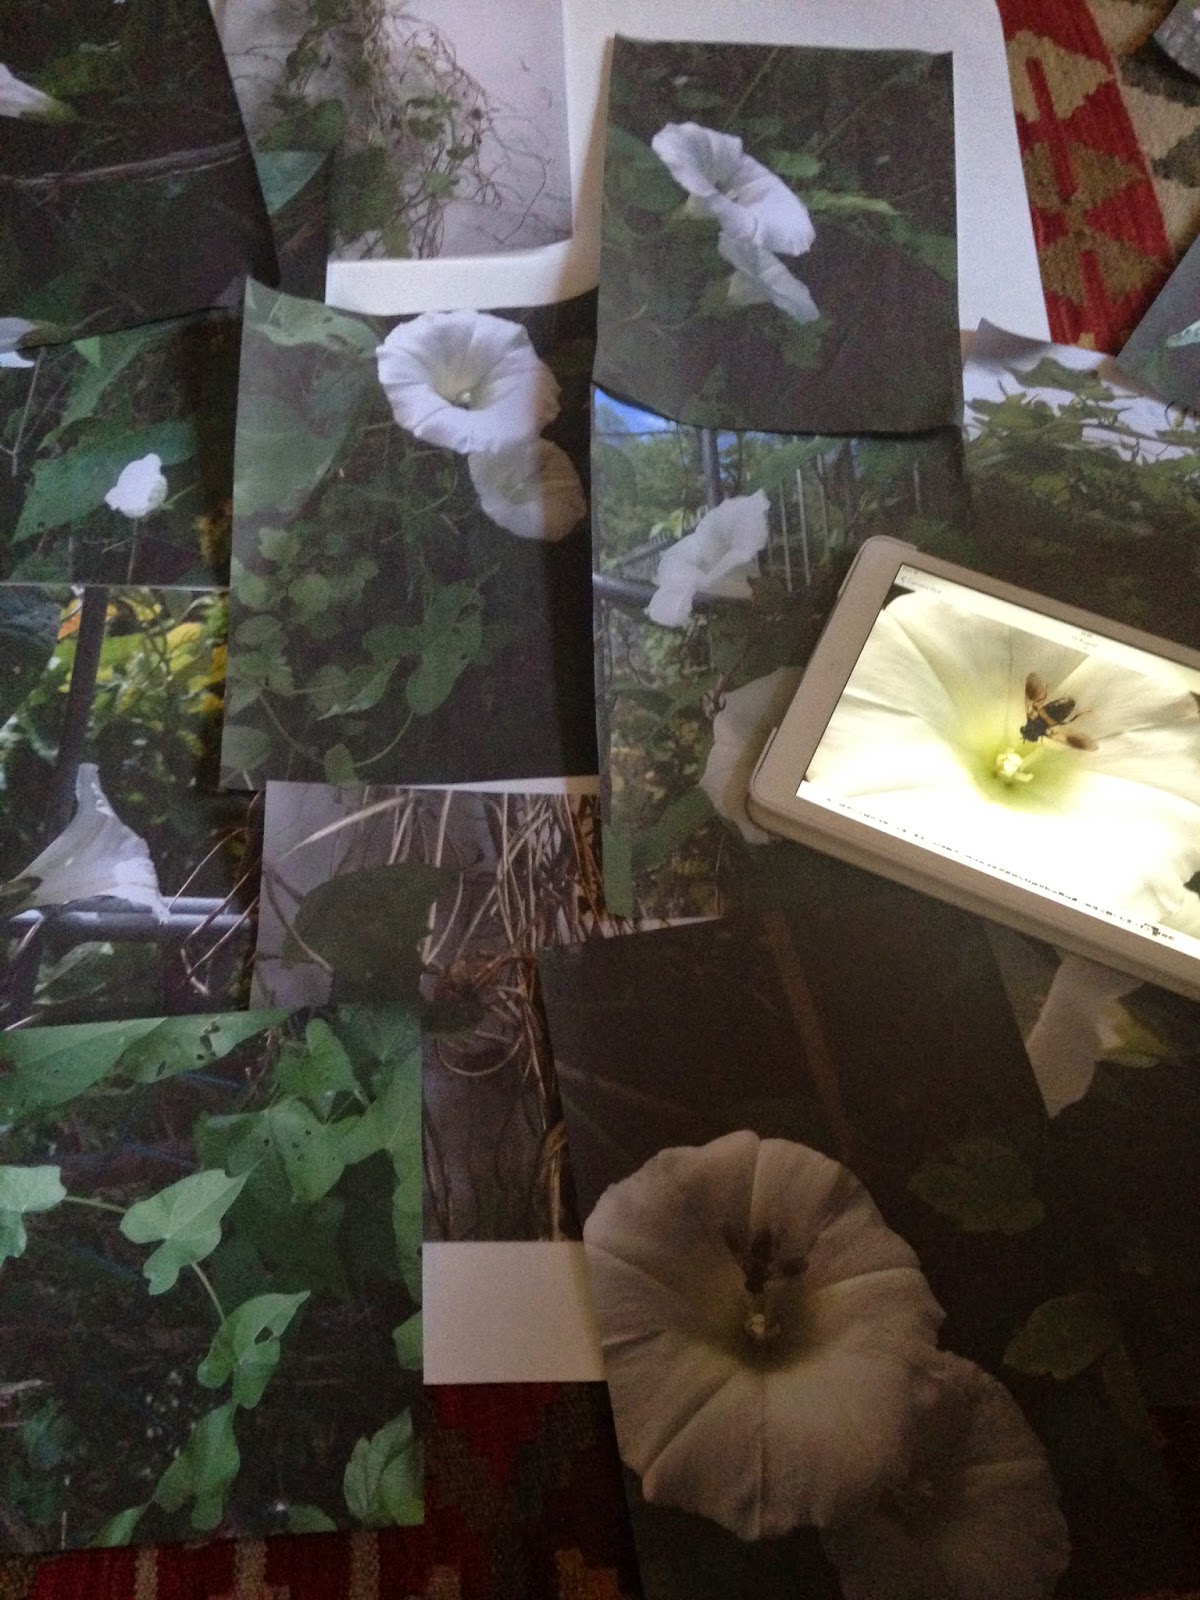 |
| For
more complicated compositions - I tend to take lots of photos of the
plant in situ (sometimes hundreds of photos!) 10-20 selected for
printing, I throw then on the floor and look for good shapes and ideas,
then make numerous thumbnail sketches. |
The next problem is
lighting and positioning subjects.
I've already touched on this and so far I'm finding it much easier now
the space gobbling drawing board is gone from the desk because: 1. I've
more free room on the desk for the subject and 2. I can pin some
materials to the board. The magnifier lamp shown above is for the
painting, and it clamps desk with a long adjustable arm - this is
important! But
I also need to light the subject and have several lamps which give off different types of light, some are
warm light and others are daylight lamps so give off a
cooler light,
which lamp depends on what I'm doing and the outcome I'm looking for. I
use a regular low cost lamp with adjustable arm ( in the images above)
this lamp is great for tying subjects to ( as shown)! The other lamp
used is a
twistable daylight lamp
( shown below). This type of lamp works well because I get a good
adjustment on the angle. To light a subject well you have to play with
the distance and the angle of the light. Too close and there's too much
contrast ( lights are bleached out and the darks are black), too far
away means it's all mid tone and lacks drama. So again depends what you
are looking for in the finished result.
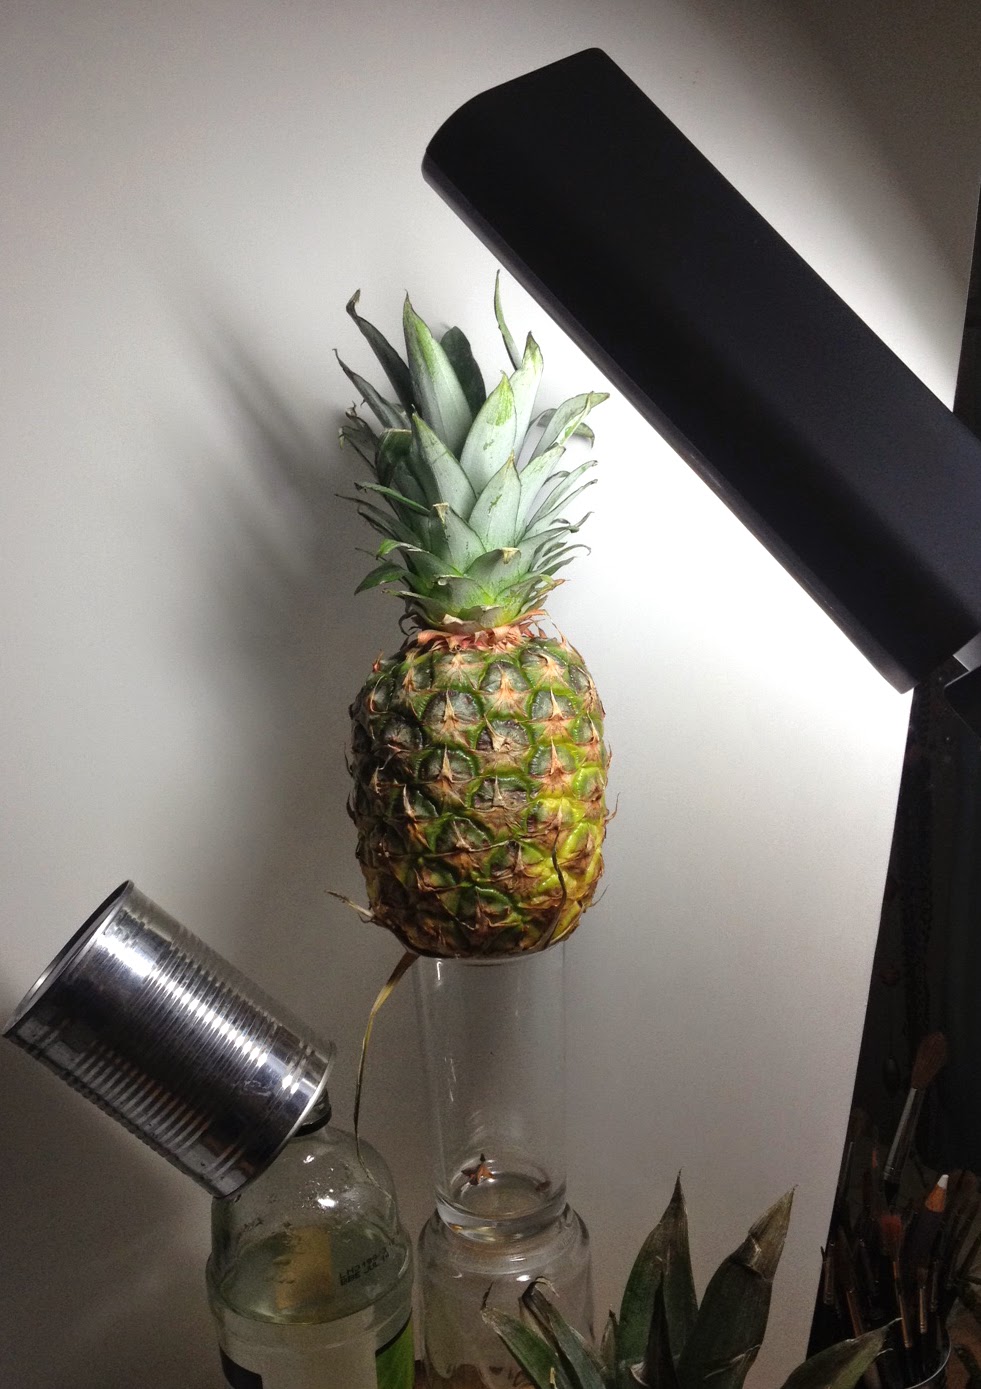 |
| Twistable
daylight lamp ( note: the tin can reflects a little light back) I try
to get a good range of highlight, mid tone and shade, with a little
reflected light too) |
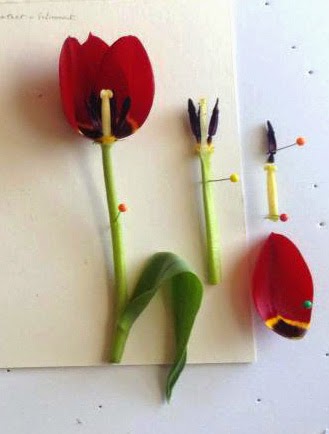 |
| Pinning subjects to foam board to position on the drawing board. |
I place
white card behind the subject so it's clear to see. I usually photograph it in situ.
I use a retort stand ( which I can't find at the moment) and all sorts
of jars, boxes and anything I can find to arrange subjects. For ' flat'
subjects, such as dissections and leaf portraits, I secure the subject to
foam board with
florist wire and
dressmaking pins and make good use of the sticky
Oasis Minifix,
which is brilliant stuff for the natural positioning of leaves etc.
These can be places on the easel next to the watercolour paper.
Having bad eyesight means that numerous
magnifiers are a must have, the main one is the big illuminated
Draper angle poise magnifier.
It's a bit heavy and cumbersome and given a choice I'd swap it for
something more lightweight but the magnifier is a decent size and
quality is good enough so it's stays. I use several smaller
hand helds with magnification
from a x 1 up to x5. They are used to see more clearly but also to
check for clean edges and overlaps ( the brass one top left is good for
this ). They're also useful for examining detail in the subject. I also
have a
loupe but its' disappeared at the moment.
 |
| A few of the various strength magnifiers |
Paints and palettes. I always revert back to my old faithful
W & N Artist pans in the modified wooden paintbox, which I've had for many years. Most recently I decided to secure the pans with
Velcro because they were always dislodging. The colours are
arranged in W & N colour chart order
( I keep a painted reference card in the lid of the box as well as the
chart on my drawing board. I tend to take out the colours I'm using and
keep them on the palette. I prefer pans for botanical work as they're
more suited to a 'dry' painting style, particularly when working on
vellum. A common problem is having far too many paints, which is a
mistake I made - an absolute maximum of 24 colours is all that are
required but I've got them so may as well make use of them now.
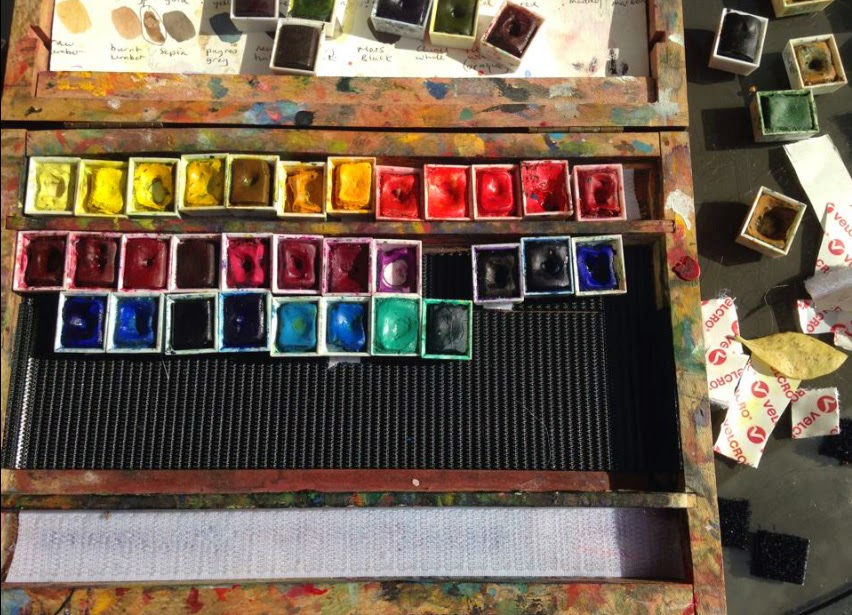 |
| Attaching the pans with Velcro stops them from falling out. |
I also have
various tubes of paint, including
Daniel Smith, W &N and Sennelier which I keep in the drawer. I use
these for larger washes and store these in Tupperware! I don't use them
very often but some colours are preferable for certain jobs.
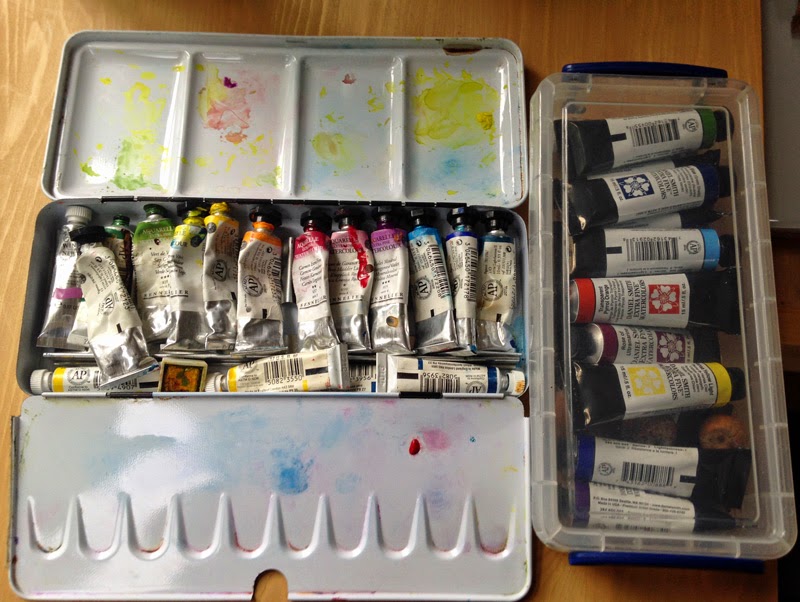 |
| Additional tubes, seldom used but still useful |
Limiting myself to two
ceramic palettes,
one is deeper at one side for mixing larger amounts of paint, the other
has small wells and a lid which is very useful for mixing and for
keeping the dust out....dust and fluff is the enemy! I use jam jars with
lids for water, again the lid keep any dust out!
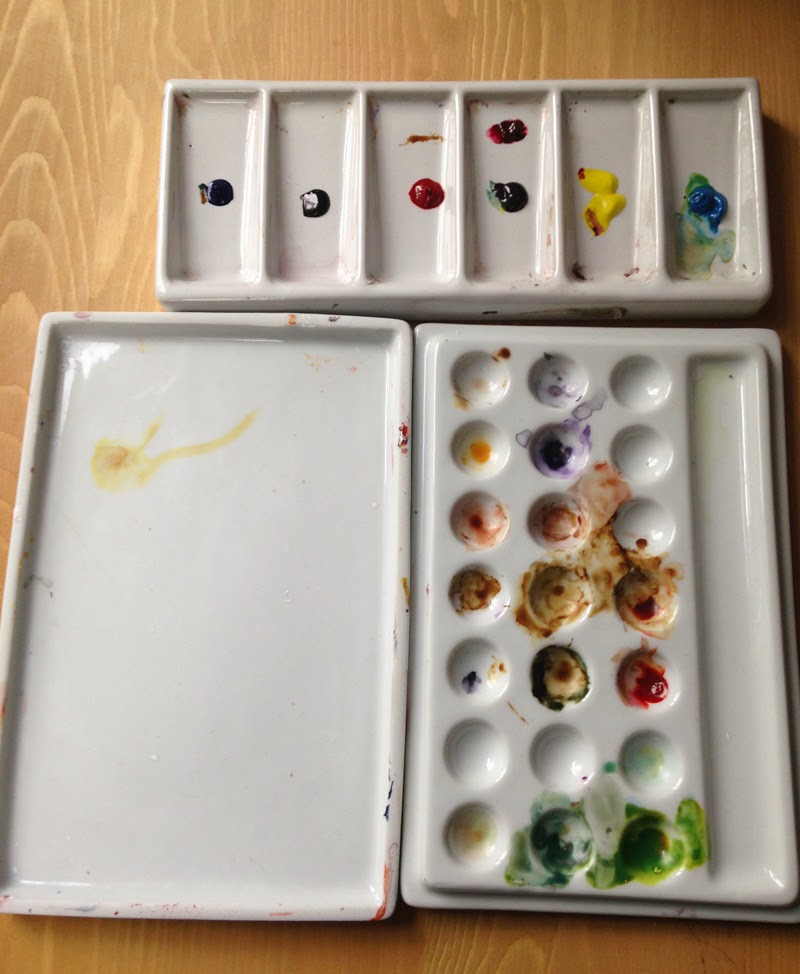 |
| Ceramic palettes deep palette top and palette with lid. |
Brushes. The odds and ends live in old tin cans but most brushes now live in a
folding brush holder,
which was a free gift from Ken Bromley. This can hang below the drawing
board on the easel for ease of access. It's also really
useful for transporting them without damage. I use W & N
Kolinsky
sable, miniatures, rounds and flats, Rosemary and Co, spotters,
designer and short flats ( my favourite little brush!) I also have some
beautiful hand made brushes, which were a gift from the Brushman, David
Jackson. They have the finest points I've ever come across. I've also a few old
da Vinci brushes, but supply has been an issue with these.
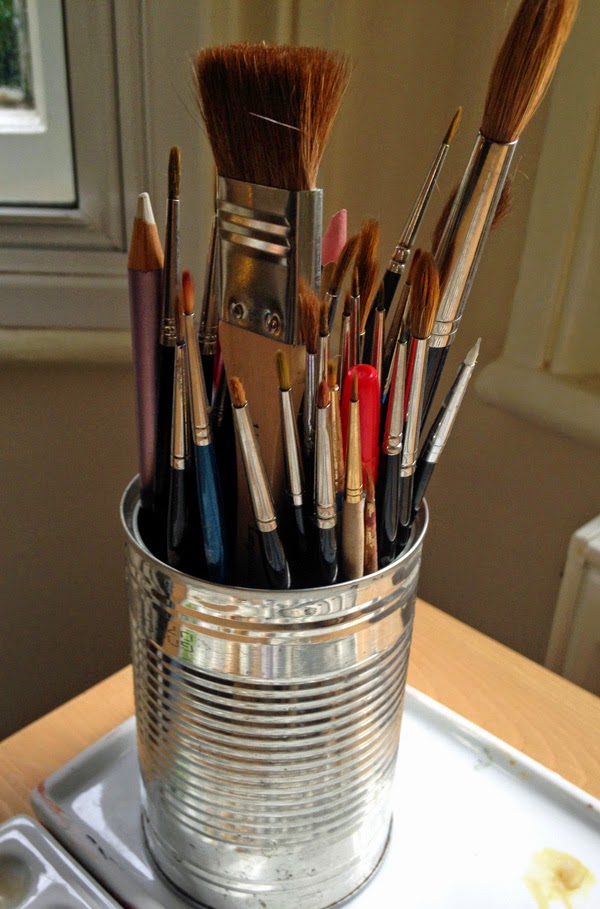 |
| Old tin cans make good additional storage containers |
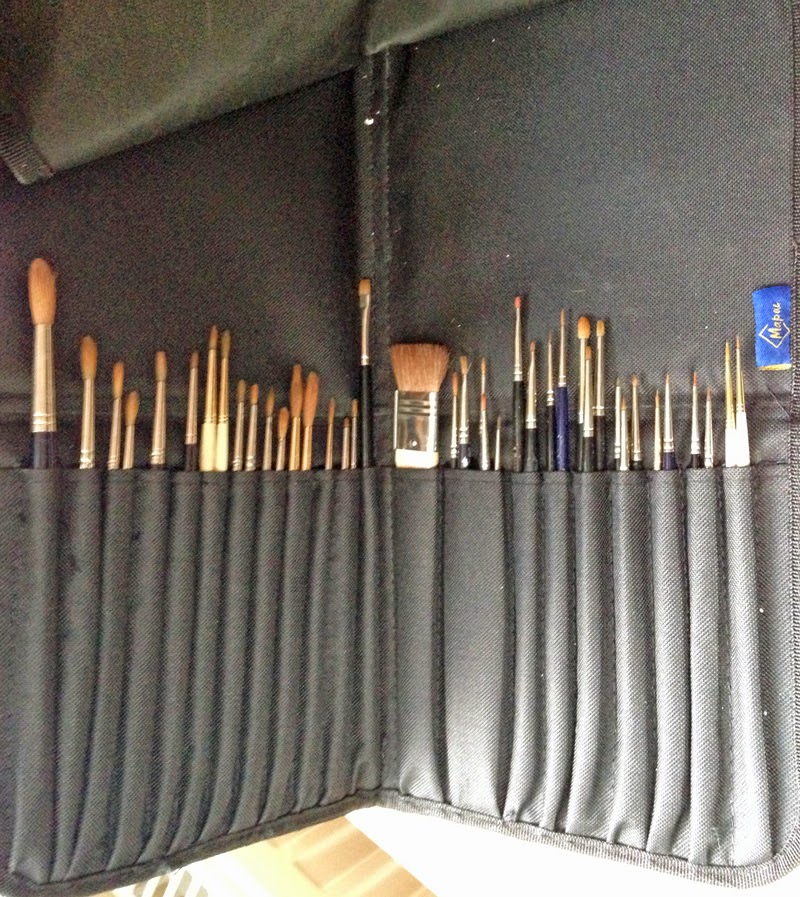 |
| Brush Holder, very handy free gift! |
Pencils are kept in a pencil roll, for space saving.
I've always kept
pencils in their tins until recently but have started to store them all in
pencil rolls, they're lighter and more space efficient as well as easy to transport. I use mostly
Faber Castell 9000 and sometimes Cretacolour Monoliths - all for t
onal work. I use a variety of
mechanical pencils for fine line drawing.
All other bit and pieces, such as sharps
e.g.scalpels, blades, things for securing subjects, erasers etc. are
kept in an old Gillette razor box. This was given to me many years ago
by a friend, I think it was a shop display box. It has a glass lid. I
also keep the mechanical pencils and leads in it- otherwise these seem
to get lost..... I love this box!
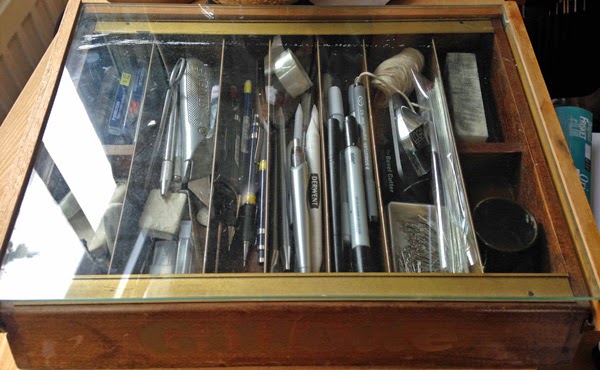 |
| A useful and lovely box for the sharps and easily lost items. |
|
|
Various
dried subjects and reference material,
such as seed pods, shells, and skulls are kept in boxes. These are all
handy reference material collected over the years and too valuable and
sentimental to throw away. Many have been the subject of paintings and
some were nurtured from seed and produced seed themselves.
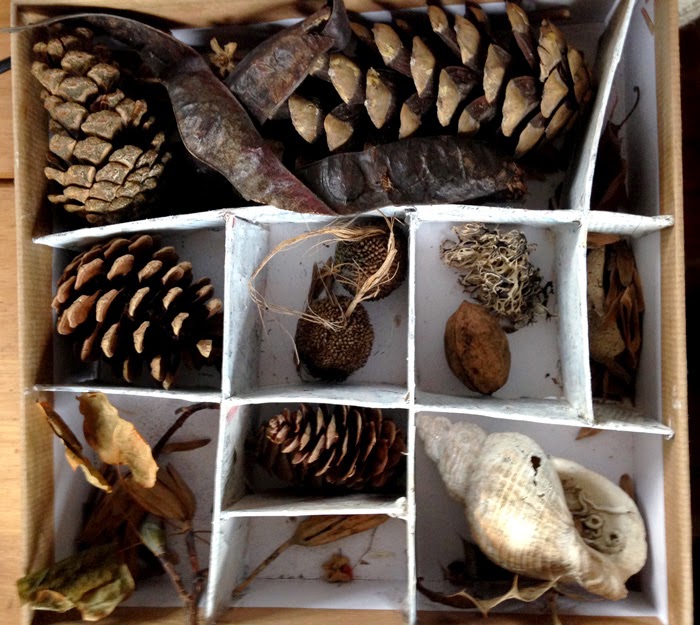 |
| One of the boxes of old subject material |
Books are essentials too, particularly
reference and the Floras. Many of the instruction type or coffee table style books were sold or given away because of lack of space. I've built
tall narrow bookcases,
which have been painted and strategically placed around the flat, they
look OK and don't dominate too much. I also keep the sketchbooks in the
book case.
My biggest storage problem is
paper, and vellum
storage because of the size. Much as I've always wanted one, I don't
have enough room for a plan chest, although you can get then in a coffee
table style, but wouldn't want to keep paper and especially vellum near
to a fireplace. So The paper lives in study cardboard boxes under the
bed! The vellum lives on top of the wardrobe! I use Fabriano Artistico
HP 140 lb imperial sheets and on a roll as well as 300lb imperial
sheets. For graphite I use the same Fabriano or the blocks of Arches HP
140lb 18 x24 inches.
Small vellum pieces must to be
kept flat and in dry but not too hot conditions, skins are rolled, so
that's no so bad. Here's the skin so you can see the problem once
unrolled! Well that's my next problem...to paint the autumn collections
started two years ago but this time onto vellum.....once I've flattened
it!
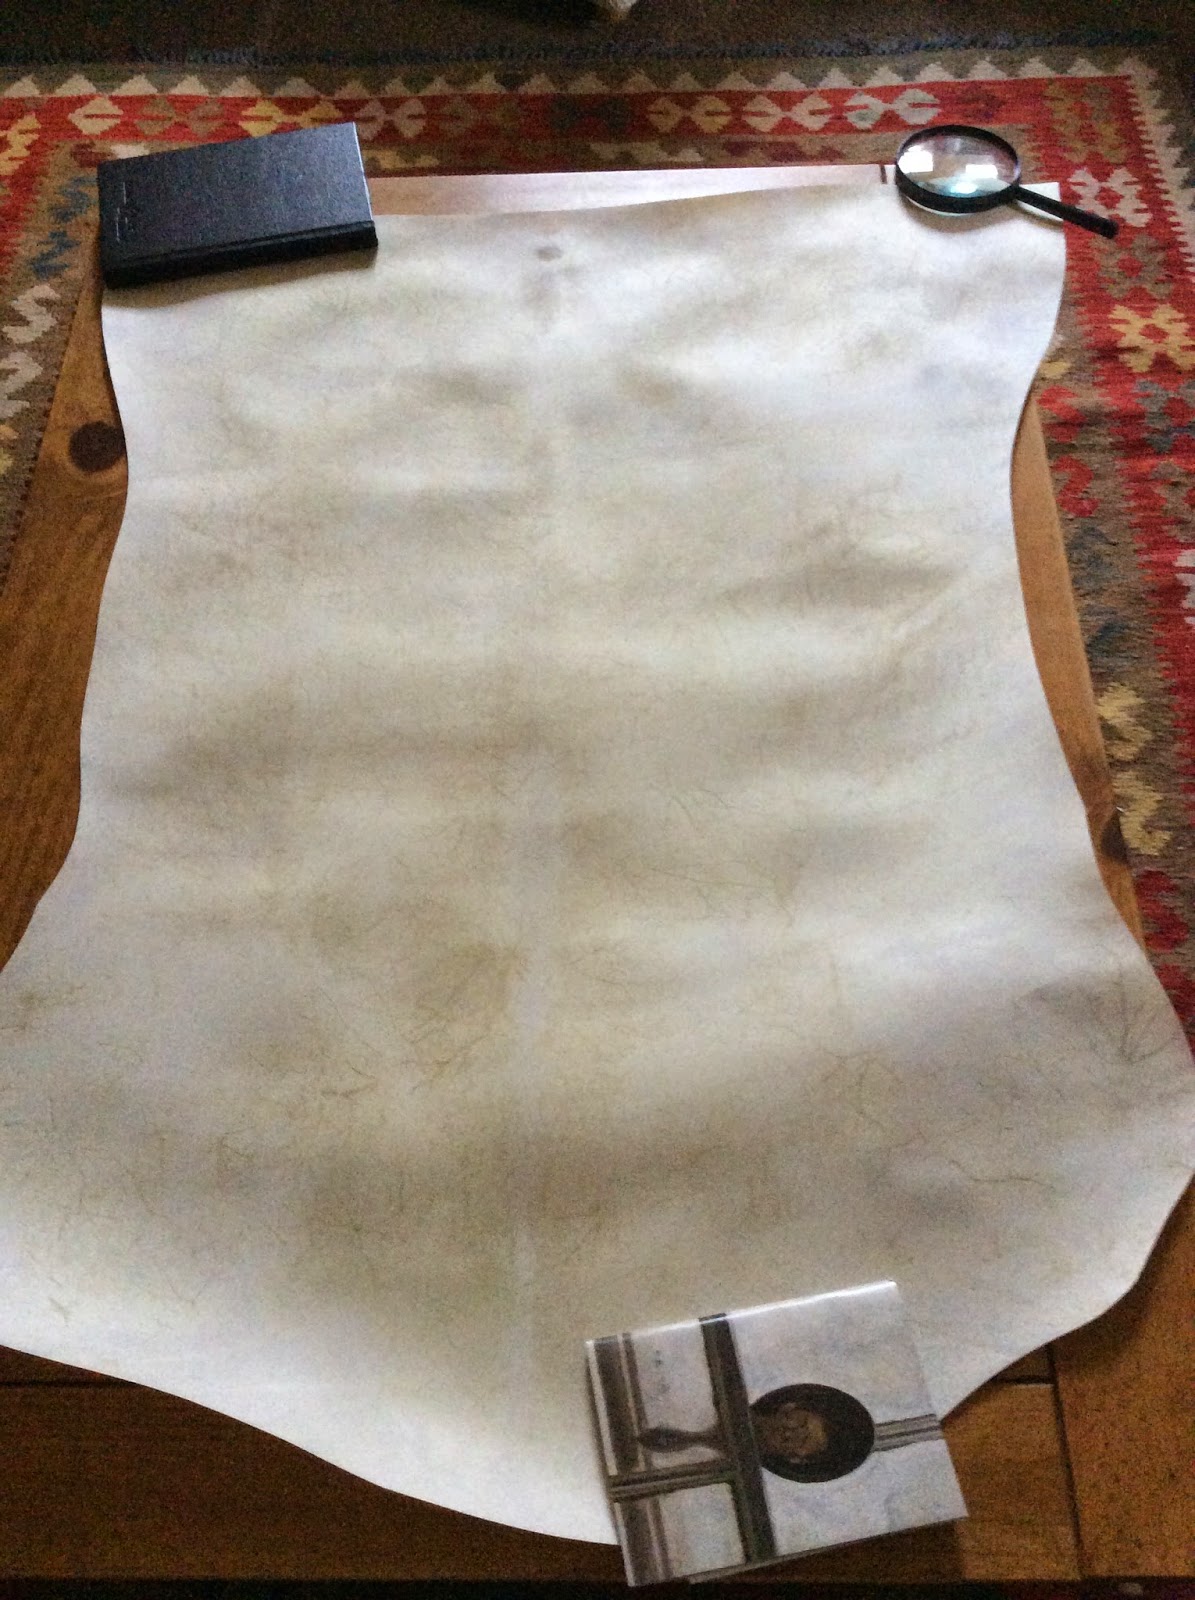 |
| Next project: Natural vellum skin to paint the autumn studies
which I started in Sept 2013. Unfortunately I had to put this work on
hold - it's been in the back of my mind since and I'm looking forward to
getting started. |
It's
surprising just how much art stuff is accumulated over the years! I wrote a full list of materials when I moved ....it was a bit of an eye opener! So if
you're about to take up painting you might want to consider the size of
the house! In this post I've mentioned just a fraction of what I've
accumulated but limited it to the things that I use regularly. There's
lots more, including microscopes, a large mount cutters, portfolios, a
guillotine etc. etc. ....all of which take valuable space.... not too mention all
the unfinished work and studies.
Now the workspace and materials are sorted all that remains is to start work!


 Pencils are kept in a pencil roll, for space saving.


Lovely to see a blog post. Best wishes for your new home. I can relate to the accumulated art stuff. As I love trying out lots of different art materials I have too much and lots of clutter with dishes of natural objects I collect.
ReplyDeleteI liked your post on Graphite-a perfect medium because you can draw with a few simple tools. I am sure we are all guilty of gathering too much stuff.
Look forward to seeing your new work.
I do appreciate your good organisation. You are not the only one that keeps flat paper under the bed: me too. I dream to have an artist room Meantime, as my son Enrico is back home only in the weekend, during the time is faraway I move to his room . Ciao
ReplyDeleteTransfer Video from iPhone to iPad
ReplyDeleteHello there. I came across this blog when googling magnifiers for botanical illustration, the internet is wonderful at times. Loved reading your blog Hope the move has been successful and your getting settled. I’m currently laid up with a bad back and so am using the time to do botanical illustration. Will enjoy following your experiences if you have time to blog. Must go and search for a good magnifier now. All the best Lynda
ReplyDelete